Don’t buy tulip bulbs every year! Once you have grown tulip flowers in your garden, you can save or propagate the bulbs to plant every season.
There are 3 ways you can PROPAGATE TULIP BULBS.
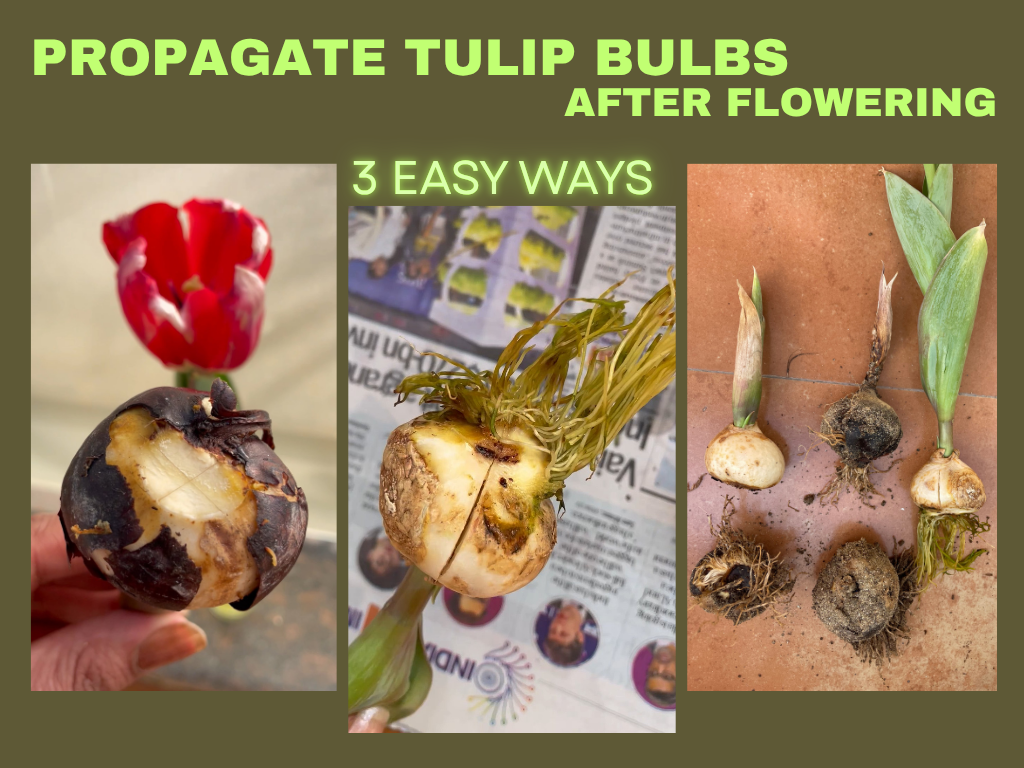
STEP 1 – CUTTING
- REMOVING BASAL PLATE : Remove the thick base disc of the bulb and mark a deep X with a knife.
- CUTTING THROUGHT THE BULBS : Remove the dark peel and mark deep cuts vertically on the sides of the bulb
- REMOVING TENDER PARTS: Cut out any tender parts making a flat surface for new bulblets
The part where cuts are made is where new bulblets will sprout.
STEP 2 – PREVENT ROT
- APPLY FUNGICIDE: This is not optional. No fungicide means the bulbs will rot instead of propagating.
STEP 3 – STORAGE OF BULBS
- Place the bulbs individually on newspapers.
- Cover with peatmoss or damp cocopeat
- Place in a box and store at a dark place
- The box should have some ventilation (e.g. a shoebox with holes poked on sides)
STEP 4 – KEEP A CHECK
- KEEP IT DAMP : The bulbs should not dry out completely while storing
- REMOVE ROTTEN BULBS: If any bulb starts to rot, remove it immediately to save the other tulip bulbs that are propapagting
TIPS TO KEEP IN MIND WHILE PROPAGATING TULIP BULBS
- New bulblets take time to grow and flower. Plant them each season and store for next season till they are ready to bloom.
- Tulip bulbs rot easily while propagating. Don’t skip fungicide and keep propagating bulbs separate from each other.
- Do not let the bulbs dry out, they will not grow again.
- The propagating medium should be damp but not wet. More mositure means more chances of tulip bulbs rotting.